Font Awesome はバージョンが5になって、つぎの2つの方法で使用できるようになっています。
2つの使用方法についてはつぎのとおり、5つのカスタマイズ方法があります。
このページは、上の5つのカスタマイズ方法のうち、「1.1.2. ttfをインストールし、CSSの疑似要素(::before/::after)を使う (使い方1-2)」について説明しています。
合せて、つぎのサイト「Web Design Leaves Font Awesome 5 の基本的な使い方」を参照してください。
他のカスタマイズ方法につては、多くのWebサイトで紹介されています。
つぎのような準備があります。
つぎのサイトから、Font Awesome 5 フリー版(Version 5.12.0 Download Font Awesome Free for the Web)をダウンロードします。
https://fontawesome.com/how-to-use/on-the-web/setup/hosting-font-awesome-yourself

ダウンロードボタン
fontawesome-free-5.12.0-web.zip
(2020年1月2日現在)
ダウンロードしたfontawesome-free-5.12.0-web.zip(ファイル名は2020年1月2日現在)ファイルを解凍し、webfontsフォルダ内の3つのttfファイルをインストールします。

【インストール方法】
つぎに、インストール結果をまとめました。
| No. | ダウンロードttfファイル名 | インストール先フォルダ C:/Windows/Fonts/内のファイル名 | CSSのfont-familyの値(フォント名) | 備考 |
| 1 | fa-brands-400.ttf | Font Awesome 5 Brands 標準 | Font Awesome 5 Brands (注1) | |
| 2 | fa-regular-400.ttf | Font Awesome 5 Free | Font Awesome 5 Free | |
| 3 | fa-solid-900.ttf | 非表示 | Font Awesome 5 Free (注2) | |
| 注記 | (注1)Brandsには、Free を付けない (注2)solidを付けない。font-weight: 900; - 2021.5.10訂正 | |||
Font Awesome 5 Freeフォントを使用する場合は、Font Awesome 5 CSSファイルを、<head>タグ内に、つぎのサイトを参照しCDNのall.cssまたはall.min.cssのURLをコピーしインクルードします。
https://cdnjs.com/libraries/font-awesome
Font Awesome 5 BrandsまたはFont Awesome 5 Solidを使用する場合は、CSSファイルは不要です。
<!-- Font Awesome 5 CSSファイル CDN -->
<link href="https://cdnjs.cloudflare.com/ajax/libs/font-awesome/5.11.2/css/all.css" rel="stylesheet">
ttfファイルを使う場合、CSSの::before(::after)擬似要素で、HTMLタグ要素の直前(直後)にWebフォントアイコンを挿入します。
挿入内容Webフォントアイコンはcontentプロパティで指定します。
ここの例は、blockquoteタグ領域の直前・直後に、Font Awesome 5 Free Regularフォントアイコンを表示します。
blockquote::before{
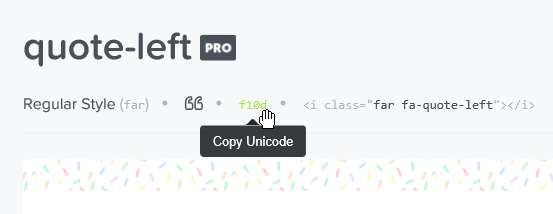
content: "\f10d"; /* quote-leftアイコン */
font-family: "Font Awesome 5 Free"; /* Font Awesome 5 Regularフォント */
font-weight: 900; /* Font Awesome 5 Freeのとき、Fontウェイトは900 */
}
blockquote::after{
content: "\f10e"; /* quote-rightアイコン */
font-family: "Font Awesome 5 Free"; /* Font Awesome 5 Regularフォント */
font-weight: 900;
}
<blockquote style="background:beige;padding:10px">
        この文の直前、直後にWebフォント絵文字アイコンを表示します。
</blockquote>
<!DOCTYPE html>
<html>
<head>
<meta charset="utf-8">

<!-- Font Awesome 5 CDN CSSファイル  -->
<link href="https://cdnjs.cloudflare.com/ajax/libs/font-awesome/5.11.2/css/all.css" rel="stylesheet">

<!-- Font Awesome 5 CSS Brands -->
<style>
blockquote::before{
    content: "\f10d";
    font-family: "Font Awesome 5 Free";
    font-weight: 900;
}
blockquote::after{
    content: "\f10e";
    font-family: "Font Awesome 5 Free";
    font-weight: 900;
}
</style>

<style>
body{
 width:900px; margin: 0 auto;
 font: 14px 'Lucida Grande', Verdana, sans-serif;
 }
</style>
</head>
<body>
<h3 align=center>Font Awesome 5 Free サンプル 1</h3>
<blockquote style="background:beige;padding:10px">
        この文の直前、直後にWebフォント絵文字アイコンを表示します。
</blockquote>

</body>
</html>
| 項番 | スタイル(注) | CSS font-family | 利用方法 | CSS font-weight | Style Prefix - 表示例 |
| 1 | Solid | Font Awesome 5 Free | Free | 900 | fas <i class="fas fa-camera"></i> |
| 2 | Brands | Font Awesome 5 Brands | Free | 400 | fab <i class="fab fa-font-awesome"></i> |
| 3 | Regular | Font Awesome 5 Free | Free/Pro Required | 900(Free)/400 | far <i class="far fa-camera"></i> |
| 4 | Light | - | Pro Required | 300 | fal <i class="fal fa-camera"></i> |
| 5 | Duotone | - | Pro Required | 900 | fad <i class="fad fa-camera"></i> |
|
(注)スタイルの項目は、Font Awesome 5の「アイコン一覧」ページへリンクしています。 ・Regularの場合、「アイコン一覧」で、Proアイコンはグレイ表示になっていますがFreeで使用できます。 ・Solidの場合、「アイコン一覧」で、グレイ表示のProアイコンは使用できません。 ・Brandsの場合、Pro,Freeの区別がなく、すべて使用できます。 | |||||
3つのSolidアイコンを、順にliタグ要素の先頭、直後、先頭に、横並びに表示する例です。
/* Font Awesome 5 Free Solidアイコン */

#ul_solid {
  font-family: "Font Awesome 5 Free"; /* Font Awesome 5 Free Solid フォント */
  font-weight: 900;
  margin-right: 5px;
  list-style: none;   /* liタグのリスト先頭にマーカーを表示しない */
  /* li(子要素)の横並び ブラウザ対応
  display: -webkit-flex;
  display: -moz-flex;
  display: -ms-flex;
  display: -o-flex;
  */
  display: flex;  /* li(子要素)の横並び */
}
.baby::before {
  content: "\f77c";  /* babyアイコン */
  color: red;        /* アイコンの色 */
  font-size: 30px;   /* アイコンの大きさ */
}
.baby-carriage::after {
  content: "\f77d";  /* baby-carriageアイコン */
  color: #3b5998;
  font-size: 30px;
}
.bicycle::before {
  content: "\f206";  /* baby-carriageアイコン */
  color: green;
  font-size: 30px;
}

#ul_solid li {
  margin-right: 10px;
  border: 1px solid #ddd;
  border-radius: 5px;
  padding: .5rem
}
<ul id="ul_solid">
  <li class="baby"> baby</li>
  <li class="baby-carriage">baby-carriage </li>
  <li class="bicycle"> bicycle</li>
</ul>
<!DOCTYPE html>
<html>
<head>
<meta charset="utf-8">

<style>
/* Font Awesome 5 Free Solidアイコン */

#ul_solid {
  font-family: "Font Awesome 5 Free";  /* Font Awesome 5 Free Solid フォント */
  font-weight: 900;
  margin-right: 5px;
  list-style: none;
  /*
  display: -webkit-flex;
  display: -moz-flex;
  display: -ms-flex;
  display: -o-flex;
  */
  display: flex;
}

.baby::before {
  content: "\f77c";  /* babyアイコン */
  color: red;
  font-size: 30px;
}
.baby-carriage::before {
  content: "\f77d";  /* baby-carriageアイコン */
  color: #3b5998;
  font-size: 30px;
}
.bicycle::before {
  content: "\f206";  /* baby-carriageアイコン */
  color: green;
  font-size: 30px;
}

#ul_solid li {
  margin-right: 10px;
  border: 1px solid #ddd;
  border-radius: 5px;
  padding: .5rem
}
 </style>

<style>
body{
 width:600px; margin: 0 auto;
 font: 14px 'Lucida Grande', Verdana, sans-serif;
 }
</style>
</head>
<body>
<h3>ULタグで、Solidアイコンを使用した例 ttf=Font Awesome 5 Solid </h3>
<ul id="ul_solid">
  <li class="baby"> baby</li>
  <li class="baby-carriage"> baby-carriage</li>
  <li class="bicycle"> bicycle</li>
</ul>
<br>

</body>
</html>
3つのBrandsアイコン(twitter,facebook,instagram)を、順にliタグ要素の先頭、先頭、先頭に、横並びにSNSアイコンを表示する例です。
/* Font Awesome 5 Brands アイコン */
#ul_brands {
  font-family: "Font Awesome 5 Brands";  /* Brandsアイコン ttfは、Free を付けない */
  margin-right: 5px;
  list-style: none;
  /* li(子要素)の横並び ブラウザ対応
  display: -webkit-flex;
  display: -moz-flex;
  display: -ms-flex;
  display: -o-flex;
  */
  display: flex;  /* li(子要素)の横並び */
}

.twitter{
   background: #00aced;  /* li領域の背景色 */
   color: #ffffff;       /* li領域の文字の色 */
}
.twitter::before {
  content: "\f099";  /* twitter アイコン */
  color: #ffffff;    /* twitter アイコンの色 */
}

.facebook {
  background: #3b5998;  /* li領域の背景色 */
  color: #ffffff;       /* li領域の文字の色 */
}
.facebook::before {
  content: "\f39e";     /* facebook-f アイコン */
  color: #3b5998;       /* facebook-f アイコンの色 */
  background: #ffffff;  /* facebook-f アイコンの背景色 */

}

.instagram::before {
  content: "\f16d";    /* instagram アイコン */
  color: #e1306c;      /* instagram アイコンの色 */
}

#ul_brands li {
  margin-right: 10px;
  border: 1px solid #ddd;
  border-radius: 5px;
  padding: 3px;
}
<ul id="ul_brands">
  <li class="twitter"> tweet</li>
  <li class="facebook"> Share</li>
  <li class="instagram"> Instagram</li>
</ul>
<!DOCTYPE html>
<html>
<head>
<meta charset="utf-8">
<!-- FontAwesome Brands  -->
<style>

/* Font Awesome 5 Brands アイコン */
#ul_brands {
  font-family: "Font Awesome 5 Brands";
  margin-right: 5px;
  list-style: none;
  /*
  display: -webkit-flex;
  display: -moz-flex;
  display: -ms-flex;
  display: -o-flex;
  */
  display: flex;
}

.twitter{
   background: #00aced;  /* li領域の背景色 */
   color: #ffffff;       /* li領域の文字の色 */
}
.twitter::before {
  content: "\f099";  /* twitter アイコン */
  color: #ffffff;    /* twitter アイコンの色 */
}

.facebook {
  background: #3b5998;  /* li領域の背景色 */
  color: #ffffff;       /* li領域の文字の色 */
}
.facebook::before {
  content: "\f39e";     /* facebook-f アイコン */
  color: #3b5998;       /* facebook-f アイコンの色 */
  background: #ffffff;  /* facebook-f アイコンの背景色 */

}

.instagram::before {
  content: "\f16d";    /* instagram アイコン */
  color: #e1306c;      /* instagram アイコンの色 */
}

#ul_brands li {
  margin-right: 10px;
  border: 1px solid #ddd;
  border-radius: 5px;
  padding: 3px;
}
</style>

<style>
body{
 width:700px; margin: 0 auto;
 font: 14px 'Lucida Grande', Verdana, sans-serif;
 }
</style>

</head>
<body>
<h2>ULタグで、SNSアイコンを使用した例 - Font Awesome 5 Brands </h2>
<ul id="ul_brands">
  <li class="twitter"> tweet</li>
  <li class="facebook"> Share</li>
  <li class="instagram"> Instagram</li>
</ul>

</body>
</html>
3つのRegularアイコン(twitter,facebook,instagram)を、順にdivタグ要素の先頭、直後、先頭に、横並びに表示する例です。
Regularアイコンの場合、Font Awesome 5のCSSファイルを使用します(「HTML全体まとめ」タブ内参照)。
/* Font Awesome 5 Free Regularフォント */

#div_regular {
  font-family: "Font Awesome 5 Free";
  font-weight: 900;
  margin-right: 5px;
  padding: 5px;
  /* div(子要素)の横並び ブラウザ対応
  display: -webkit-flex;
  display: -moz-flex;
  display: -ms-flex;
  display: -o-flex;
  */
  display: flex;  /* div(子要素)の横並び */
}

.quote-left::before {
  content: "\f10d";  /* quote-left アイコン */
  color: green;      /* アイコンの色 */
  font-size: 30px;   /* アイコンの大きさ */
}

.quote-right::after {
  content: "\f10e";  /* quote-right アイコン */
  color: #3b5998;
  font-size: 30px;
}

.smile-wink::before {
  content: "\f4da";  /* smile-wink アイコン */
  color: brown;
  font-size: 30px;
}

#div_regular div {
  margin-right: 10px;
  border: 1px solid #ddd;
  border-radius: 5px;
  padding: 6px;
}
<DIV id="div_regular">
  <div class="quote-left"> quote-left</div>
  <div class="quote-right">quote-right </div>
  <div class="smile-wink"> smile-wink</div>
</DIV>
<!DOCTYPE html>
<html>
<head>
<meta charset="utf-8">

<!-- Font Awesome 5 CSSファイル -->
<link href="https://cdnjs.cloudflare.com/ajax/libs/font-awesome/5.12.0-1/css/all.css" rel="stylesheet">

<style>
/* Font Awesome 5 Free Regularフォント */

#div_regular {
  font-family: "Font Awesome 5 Free";
  font-weight: 900;
  margin-right: 5px;
  padding: 5px;
  /* div(子要素)の横並び ブラウザ対応
  display: -webkit-flex;
  display: -moz-flex;
  display: -ms-flex;
  display: -o-flex;
  */
  display: flex;  /* div(子要素)の横並び */
}

.quote-left::before {
  content: "\f10d";  /* quote-left アイコン */
  color: green;      /* アイコンの色 */
  font-size: 30px;   /* アイコンの大きさ */
}

.quote-right::after {
  content: "\f10e";  /* quote-right アイコン */
  color: #3b5998;
  font-size: 30px;
}

.smile-wink::before {
  content: "\f4da";  /* smile-wink アイコン */
  color: brown;
  font-size: 30px;
}

#div_regular div {
  margin-right: 10px;
  border: 1px solid #ddd;
  border-radius: 5px;
  padding: 6px;
}
</style>

<style>
body{
 width:800px; margin: 0 auto;
 font: 14px 'Lucida Grande', Verdana, sans-serif;
 }
</style>

</head>
<body>
<h2>divタグで、Regular絵文字アイコンを使用した例 - Font Awesome 5 Free </h2>

<DIV id="div_regular">
  <div class="quote-left"> quote-left</div>
  <div class="quote-right">quote-right </div>
  <div class="smile-wink"> smile-wink</div>
</DIV>

</body>
</html>
ブログなどで引用文を書くときは、Bkockquoteなどの引用タグを使用しますが、Font Awesome 5の応用例として引用タグ(blockquote・p・citeタグ)の使い方を取り上げます。
通例、引用文はBlockquote要素内に、pタグで引用文、citeタグで引用元情報を記述し、引用記号(”)を直前または直後表示します。
・引用文記述例(引用記号(”)略)
<blockquote>
 <p>ここの引用文・・・・</p>
 <cite>ここに引用元情報</cite>
</blockquoute>
/* 引用文 Blockquote, p, cite - Font Awesome 5 Free */

blockquote {
    position: relative;
    font-family: "Font Awesome 5 Free"; /* Font Awesome 5 Free Regularフォント */
    font-weight: 900;
    padding: 10px 20px;
    box-sizing: border-box;
    color: #4e4e4e;
    background: beige;
    width: 600px;
}

blockquote::before{
    display: inline-block;
    position: absolute;
    top: 7px;
    left: 10px;
    content: "\f10d";   /* quote-leftアイコン */
    font-style: italic; /* 斜体 */
    color: #dcdcdc;     /* quote-leftアイコンの色 */
    font-size: 45px;
    line-height: 1;
}

blockquote::after{
    display: inline-block;
    position: absolute;
    bottom: 5px;
    right: 15px;
    text-align: center;
    content: "\f10e";   /* quote-rightアイコン */
    font-style: italic; /* 斜体 */
    color: #dcdcdc;     /* quote-leftアイコンの色 */
    font-size: 45px;
    line-height: 1;
}

blockquote p {
    position: relative;
    padding: 0;
    margin: 30px 10px;
    z-index: 3;
    line-height: 1.7;
}

blockquote cite {
    position: relative;
    z-index: 3;
    display: block;
    text-align: center;
    color: #888888;
    font-size: 0.9em;
    font-style: normal; /* 斜体 */
}

blockquote a {
   text-decoration: none;
}
blockquote a:hover {
   text-decoration: underline;
}
<blockquote id="block_quote">
<p>
年末年始は冬将軍が到来。大みそかから元日は冬型の気圧配置が強まり、
北海道や東北の日本海側を中心に荒れた天気になりそうです。
</p>
    <cite>引用元 - <a href="https://weather.yahoo.co.jp/weather/" target="_blank">年末年始のお天気 - Yahoo天気</a></cite>
</blockquote>
<!DOCTYPE html>
<html>
<head>
<meta charset="UTF-8">
<title>Font Awesome 5 応用例 - blockquote, p, citeタグで引用文をつくる</title>

<!-- Font Awesome 5 CSSファイル -->
<link href="https://use.fontawesome.com/releases/v5.6.1/css/all.css" rel="stylesheet">

<style>

/* 引用文 Blockquote, p, cite - Font Awesome 5 Free */

blockquote {
    position: relative;
    font-family: "Font Awesome 5 Free"; /* Font Awesome 5 Free Regularフォント */
    font-weight: 900;
    padding: 10px 20px;
    box-sizing: border-box;
    color: #4e4e4e;
    background: beige;
    width: 600px;
}

blockquote::before{
    display: inline-block;
    position: absolute;
    top: 7px;
    left: 10px;
    content: "\f10d";   /* quote-leftアイコン */
    font-style: italic; /* 斜体 */
    color: #dcdcdc;     /* quote-leftアイコンの色 */
    font-size: 45px;
    line-height: 1;
}

blockquote::after{
    display: inline-block;
    position: absolute;
    bottom: 5px;
    right: 15px;
    text-align: center;
    content: "\f10e";   /* quote-rightアイコン */
    font-style: italic; /* 斜体 */
    color: #dcdcdc;     /* quote-leftアイコンの色 */
    font-size: 45px;
    line-height: 1;
}

blockquote p {
    position: relative;
    padding: 0;
    margin: 30px 10px;
    z-index: 3;
    line-height: 1.7;
}

blockquote cite {
    position: relative;
    z-index: 3;
    display: block;
    text-align: center;
    color: #888888;
    font-size: 0.9em;
    font-style: normal; /* 斜体 */
}

blockquote a {
   text-decoration: none;
}
blockquote a:hover {
   text-decoration: underline;
}

</style>

<style>
body{
 width:900px; margin: 0 auto;
 font: 14px 'Lucida Grande', Verdana, sans-serif;
 }
</style>
</head>
<body>
<h2>Font Awesome 5 応用例 - blockquote, p, citeタグで引用文をつくる</h2>
<br>
<!-- 引用blockquote -->
<blockquote id="block_quote">
<p>
年末年始は冬将軍が到来。大みそかから元日は冬型の気圧配置が強まり、
北海道や東北の日本海側を中心に荒れた天気になりそうです。
</p>
    <cite>引用元 - <a href="https://weather.yahoo.co.jp/weather/" target="_blank">年末年始のお天気 - Yahoo天気</a></cite>
</blockquote>

</body>
</html>
あの有名なサルワカサイトの「CSSで作る!魅力的な引用デザインのサンプル30(blockquote)」の引用ボックスのCSSサンプル30本ををFont Awesome 5にバージョンアップしてみました。
旧バージョンからFont Awesome 5へのバージョンアップは、つぎの2つの項目を変更します。
![]() Font Awesome 5にカスタマイズした「CSSで作る!魅力的な引用デザインのサンプル30(blockquote)」のデモ30例
Font Awesome 5にカスタマイズした「CSSで作る!魅力的な引用デザインのサンプル30(blockquote)」のデモ30例


 1
1


・関連リンク(ページ内)

最終更新日:2020.1.17(初版) 2021.5.10 |
メール: |
掲示板 |