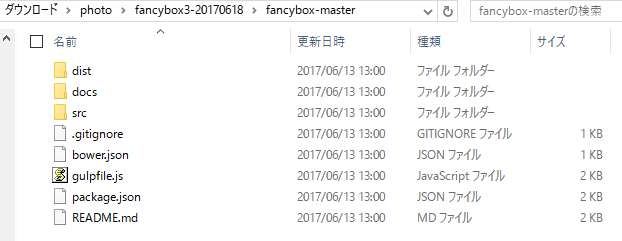
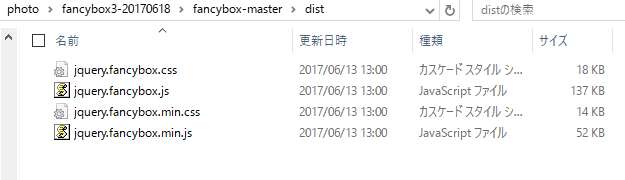
※jquery.fancybox.min.js、jquery.fancybox.min.cssは圧縮版。
fancyBox((c) Janis Skarnelis)は、画像など多くのコンテンツのビューアとして人気のあるjQuery系のLightboxです。
2017年春リリースされたfancyBox3は、旧版fancyBox2に比べ大きくバージョンアップされたようです。fancyBox3には、おおまかに5つの機能があります。
なお、fancyboxをダウンロードをしない場合は、CDNJSサイトのFancyboxファイルを使用します。
Fancyboxを使用するためには、jQueryファイルとFancyboxのCSSファイル、JSファイルが必要です。
これらのファイルをロードするには、下のHTMLコードのとおり、記述します。
jquery.fancybox.min.js(jquery.fancybox.min.css)はjquery.fancybox.js(jquery.fancybox.css)の圧縮版で、どちらかを使用します。
<!DOCTYPE html>
<html>
<head>
	<meta charset="utf-8">
	<title>My page</title>

	<!-- CSS -->
	<link rel="stylesheet" type="text/css" href="dist/jquery.fancybox.min.css"> <!-- distは任意のフォルダ名 -->
</head>
<body>
	<!-- HTML content -->
        ・・・
	<!-- JS -->
	<script src="//code.jquery.com/jquery-3.2.1.min.js"></script> <!-- jQuery -->
	<script src="dist/jquery.fancybox.min.js"></script> <!-- distは任意のフォルダ名 -->
</body>
</html>
<!-- Fancyboxをダウンロードしない場合 -->
<html>
<head>
	<meta charset="utf-8">
	<title>My page</title>

	<!-- CSS -->
	<link rel="stylesheet" type="text/css" href="https://cdnjs.cloudflare.com/ajax/libs/fancybox/3.0.47/jquery.fancybox.min.css">
</head>
<body>
	<!-- HTML content -->
        ・・・
	<!-- JS -->
	<script src="//code.jquery.com/jquery-3.2.1.min.js"></script> <!-- jQuery -->
	<script src="https://cdnjs.cloudflare.com/ajax/libs/fancybox/3.0.47/jquery.fancybox.min.js"></script>
</body>
</html>
●個別画像
<a href="image.jpg" data-fancybox data-caption="My caption"><img src="thumbnail.jpg" alt="" /></a>

●グループ画像(ギャラリー)
<a href="image_1.jpg" data-fancybox="group1" data-caption="Caption 1"><img src="thumbnail_1.jpg" alt="" /></a>
<a href="image_2.jpg" data-fancybox="group1" data-caption="Caption 2"><img src="thumbnail_2.jpg" alt="" /></a>
<script type="text/javascript">
	$("[data-fancybox]").fancybox({
		// オプションはここに書きます
	});
</script>
Fancyboxの基本の機能を実現するHTML例を示します。Fancyboxは、モーダル画面の操作をキーボードのキーで行うことができます。
<!DOCTYPE html>
<html>
<head>
	<meta charset="utf-8">
	<title>fancyBox3の基本的な使い方 - 画像(デモ)</title>

	<!-- CSS -->
	<link rel="stylesheet" type="text/css" href="dist/jquery.fancybox.min.css"> <!-- distは任意のフォルダ名 -->
</head>
<body>
	<!-- HTML コンテンツ -->
<h2>fancyBox3の基本的な使い方 - 画像(デモ)</h2>
<p>●個別画像</p>
<a href="people/girl-pixabay-03.jpg" data-fancybox data-caption="女性 (c)pixabay.com"><img src="people/girl-pixabay-03s.jpg" alt="" /></a>

<p>●グループ画像(ギャラリー)</p>
<a href="sun/sun-pixabay01.jpg" data-fancybox="group1" data-caption="陽の光1 (c)pixabay.com"><img src="sun/sun-pixabay01s.jpg" alt="" /></a>
<a href="sun/sun-pixabay02.jpg" data-fancybox="group1" data-caption="陽の光2 (c)pixabay.com"><img src="sun/sun-pixabay02s.jpg" alt="" /></a>
</p>
	<!-- JS -->
	<script src="//code.jquery.com/jquery-3.2.1.min.js"></script>
	<script src="dist/jquery.fancybox.min.js"></script> <!-- distは任意のフォルダ名 -->
<script type="text/javascript">
	$("[data-fancybox]").fancybox({
		// オプションはここに書きます
	});
</script>

</body>
</html>
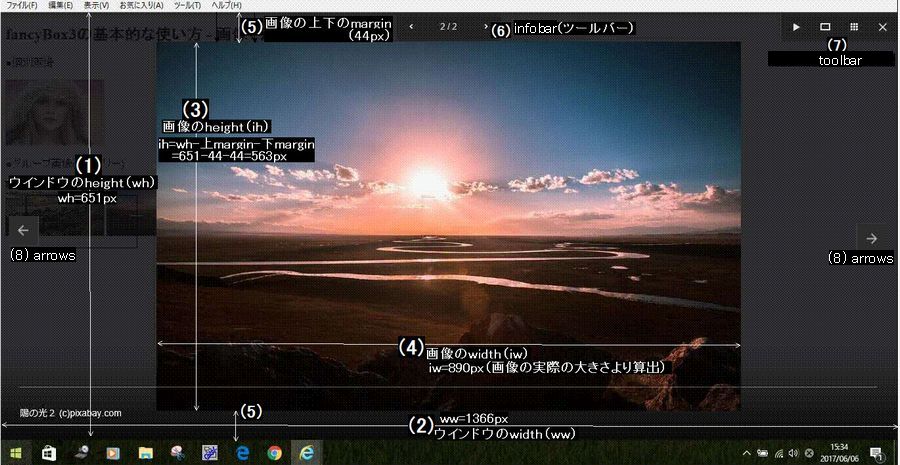
サムネール画像などをクリックして、ズームイン表示されたモーダルウィンドウのレイアウトを下に示します。
図 fancybox3モーダル画面レイアウト
(前提 媒体:ノートPC / 画面サイズ:1366x768px / ブラウザ:IE11 / 画像の実際の大きさ:1920x1214px)
 (説明)
(説明)

fancyBox3がサポートするメディアタイプは、つぎのとおりです。
Aタグでモーダルウインドウに表示する画像を記述し、IMGタグでサムネール画像を記述します。 Aタグで、data-fancybox属性を定義しfancyboxを使うことを宣言します。 また、Aタグのdata-caption属性でタイトルを記述することができます。 なお、ギャラリー(グループ画像スライドショー)の場合は、data-fancybox属性でユニークなグループ名を定義します。
画像(image)の標準的な使い方は、(1)個別の画像、(2)グループの画像でギャラリー および (3)1枚の画像を見せてギャラリーがあります。 下のタブメニュー(HTML,Javascript,CSS)は、いずれかを選択するまで自動スライドします。
<h2>fancyBox3 画像の標準的な使い方3つ(デモ)</h2>
<p>(1) 個別画像</p>
<a href="people/girl-pixabay-03L.jpg" data-fancybox data-caption="女性 (c)pixabay.com">
     <img src="people/girl-pixabay-03s.jpg" alt="" width="150" /></a>

<p>(2) グループ画像(ギャラリー)</p>
<a href="sun/sun-pixabay01L.jpg" data-fancybox="group1" data-caption="陽の光1 (c)pixabay.com">
     <img src="sun/sun-pixabay01s.jpg" alt="" width="150" /></a>
<a href="sun/sun-pixabay02L.jpg" data-fancybox="group1" data-caption="陽の光2 (c)pixabay.com">
     <img src="sun/sun-pixabay02s.jpg" alt="" width="150" /></a>
<a href="sun/sun-pixabay03.jpg" data-fancybox="group1" data-caption="陽の光3 (c)pixabay.com">
     <img src="sun/sun-pixabay03s.jpg" alt="" width="150" /></a>
<a href="sun/sun-pixabay04.jpg" data-fancybox="group1" data-caption="陽の光4 (c)pixabay.com">
     <img src="sun/sun-pixabay04s.jpg" alt="" width="150" /></a>
<a href="sun/sun-pixabay05.jpg" data-fancybox="group1" data-caption="陽の光5 (c)pixabay.com">
     <img src="sun/sun-pixabay05s.jpg" alt="" width="150" /></a>

<h3>(3) 1枚の写真を見せてギャラリー</h3>
<p>
    <a href="../images/sagamihara-park/P4280327.jpg" data-fancybox="images-single">
      <img src="../images/sagamihara-park/P4280327-cover.jpg" />
    </a>
</p>

<div style="display: none;"> <!-- 隠す写真 -->
  <a href="../images/sagamihara-park/P4280328.jpg" data-fancybox="images-single"
     data-thumb="../images/sagamihara-park/P4280328s.jpg"></a>
  <a href="../images/sagamihara-park/P4280329.jpg" data-fancybox="images-single"
     data-thumb="../images/sagamihara-park/P4280329s.jpg"></a>
  <a href="../images/sagamihara-park/P4280331.jpg" data-fancybox="images-single"
     data-thumb="../images/sagamihara-park/P4280331s.jpg"></a>
  <a href="../images/sagamihara-park/P4280334.jpg" data-fancybox="images-single"
     data-thumb="../images/sagamihara-park/P4280334s.jpg"></a>
</div>
	$("[data-fancybox]").fancybox({
		// オプションはここに書きます
	});
space
拡大表示された画像をコピーさせたくない場合は、fancybxオプションのprotectを true に設定します。 また、キーボードのキー操作による画面制御を禁止する場合は、オプションのkeyboardを false に設定します。
<h2>fancyBox v3.1 - 画像のコピー禁止(右クリック抑止)およびキーボード操作抑止 (option)-(デモ)</h2>

<h3>●個別画像 - 透かし(watermark)追加の例</h3>
<a href="people/girl-pixabay-03L.jpg" data-caption="女性 (c)pixabay.com" data-fancybox="watermrk">
     <img src="people/girl-pixabay-03s.jpg" alt="" width="150" /></a>

<h3>● グループ画像(ギャラリー)</h3>
<a href="sun/sun-pixabay01L.jpg" data-fancybox="group1" data-caption="陽の光1 (c)pixabay.com">
     <img src="sun/sun-pixabay01s.jpg" alt="" /></a>
<a href="sun/sun-pixabay02L.jpg" data-fancybox="group1" data-caption="陽の光2 (c)pixabay.com">
     <img src="sun/sun-pixabay02s.jpg" alt="" /></a>
$('[data-fancybox]').fancybox({
  // オプションはここに書きます
  protect: true     //右クリック抑止
  keyboard : false  //キーボード操作抑止
});

$('[data-fancybox="watermrk"]').fancybox({
  protect    : true,
  slideClass : 'watermark'	// Custom CSS class for slide element
});

// 透かしマーク Preload watermark image Please, use your own image
(new Image()).src = "http://fancyapps.com/GJbkSPU.png";
/* 透かし watermark */
.fancybox-slide.watermark .fancybox-spaceball {
  background-image: url('http://fancyapps.com/GJbkSPU.png');
  background-size: cover;
  background-repeat: no-repeat;
 }
HTML5から追加の<figcaption>タグにより、図表にキャプションを付けることができますが、このキャプションをdata-captionのキャプションに使用できます。
<h2>fancyBox v3.1 - <figcaption>タグによるカスタマイズ キャプション(デモ)</h2>
●グループ画像(2枚)
<ul class=lilist>
<li>
<figure style="width:160px;">
  <a href="people/girl-pixabay-19.jpg" data-fancybox="imageSet1">
      <img src="people/girl-pixabay-19s.jpg" />
      <figcaption>女性1 - (c)pixabay.com</figcaption>
  </a>
</figure>
</li>
<li>
<figure style="width:160px">
  <a href="people/girl-pixabay-20.jpg" data-fancybox="imageSet1">
      <img src="people/girl-pixabay-20s.jpg" />
      <figcaption>女性2 - (c)pixabay.com</figcaption>
  </a>
</figure>
</li>
</ul>
$( '[data-fancybox]' ).fancybox({

  caption : function( instance, item ) {
     return ($(this).find('figcaption').html());
    }

});
/*  LIタグで横並び  ※このCSSは、fancyBoxと関係ありません */
 UL.lilist li {
    float: left; width:160px;
    list-style-type: none; margin:2px
   }
 UL.lilist { zoom:1;  overflow: hidden;} /* 横並びの ClearHack */
インラインコンテンツ(inline)は、HTML内部に隠れたエレメントとしてDIVタグで生成します。 インラインコンテンツのID名は、Aタグのdata-src属性で定義した#ID名とリンクを取ります。 インラインコンテンツには、コンテンツのオープン/クローズなどの仕方に4つのバリエーションがあります。
<h2>fancyBox v3.1 インライン コンテンツ 4つのバリエーション - Inline content</h2>

<div>
  <h4>(1) デフォルトの例</h4>
  <p>
    <a data-fancybox data-src="#hidden-content-a" href="javascript:;">≫demo a</a>
  </p>

  <div style="display: none;" id="hidden-content-a"> <!-- インライン コンテンツ -->
    <h2>ようこそ!</h2>
    <p>あなたは素晴らしい!</p>
  </div>
</div>

<div>
  <h4>(2) CSS使用により、オープン/クローズ アニメーション</h4>
  <p>
    <a data-fancybox data-src="#hidden-content-b" href="javascript:;">≫demo b</a>
  </p>

  <div style="display: none;" id="hidden-content-b">
    <h2>ようこそ!</h2>
    <p>クールにアニメーション?如何ですか?</p>
  </div>
</div>

<div>
  <h4>(3) オプションのカスタマイズにより、ツールバーを表示</h4>
  <p>
    <a data-fancybox data-options='{"src": "#hidden-content-c", "touch": false, "smallBtn" : false}' href="javascript:;">≫demo c</a>
  </p>

  <div style="display: none;max-width:500px;" id="hidden-content-c">
    <h2>ようこそ!</h2>
    <p>ツールバーが付いています!</p>
  </div>
</div>

<div>
  <h4>(4) オプションのカスタマイズにより、モーダルウインドウに表示</h4>
  <p>
    <a data-fancybox data-options='{"src": "#hidden-content-4", "modal": true}' href="javascript:;">≫demo d</a>
  </p>

  <div style="display: none;max-width:600px;" id="hidden-content-4">
    <h2>ようこそ!</h2>
    <p>ウィンドウは、closeボタンを押して閉じてください!</p>
    <p><button data-fancybox-close class="btn">close</button></p>
  </div>
</div>
space
/* コンテンツ b アニメーション */
#hidden-content-b {
  /* Custom styling */
  max-width: 550px;
  border-radius: 4px;

  /* Custom transition - slide from top*/
  transform: translateY(-50px);
  transition: all .33s;
}

.fancybox-slide--current #hidden-content-b {
  transform: translateY(0);
}
Ajaxコンテンツをロードする場合は、Aタグに data-type="ajax"属性を追加し、コンテンツのURLは data-src属性で指定します。
また、コンテンツ内の特定のエレメントをロードしたい場合は、data-filter属性にフィルター(#ID名)を指定します。
なお、フィルターは、data-src属性に付加することもできます。
<h2>fancyBox v3.1 - Ajax コンテンツ Filter ajax content</h2>

<h4>(1) デフォルト例</h4>
<a style="margin-left:15px" data-fancybox data-type="ajax" data-src="http://urbanqee.com/webutil/photo/fancybox3/fancybox31-Keyboard.html" href="javascript:;" class="btn">Demo</a>

<h4>(2) コンテンツにフィルターを使った2つの方法</h4>
<p style="margin-left:15px">
  <a data-fancybox data-type="ajax" data-src="http://urbanqee.com/webutil/photo/fancybox3/fancybox31-Keyboard.html" data-filter="#Keyboard2" href="javascript:;">
1) "data-filter"属性で使う - Demo</a>
</p>
<p style="margin-left:15px">
  <a data-fancybox data-type="ajax" data-src="http://urbanqee.com/webutil/photo/fancybox3/fancybox31-Keyboard.html #Keyboard2" href="javascript:;">
2) "data-src"属性に付加して使う - Demo</a>
</p>

<p>
 (参考)Ajax コンテンツのソースコード - fancybox31-Ajax-content.html;
</p>
space
/* Ajax コンテンツの大きさ */
.modal-container, .content {
  max-width: 500px;
  padding: 30px;
  margin: 20px 0;
  border-radius: .3em;
  box-shadow: 0 0.1em 0.4em rgba(0,0,0,.3);
}
Aタグのdata-type="iframe"属性を指定し、data-src属性にWebページを指定することにより、Webページがiframeに表示されます。
ただし、iframe内のプレースメントがそのページのスクリプトまたはセキュリティ設定によってブロックされている場合は、fancyBoxで表示でません。
また、WebページがPDFファイルの場合、IEでは表示できません。もし、IEで表示したい場合は、PDF.jsをインストール必要があります。
PDF.jsのインストールと使い方はこちらを参照してください。
iframe領域の大きさなどは、CSSまたはjavascriptで変更することができます。
<h2>fancyBox v3.1 - Iframeコンテンツ(デモ)</h2>

<p>
  <a data-fancybox data-type="iframe" data-src="fancybox3-socialbutton-demo.html" href="javascript:;">
    ≫ ウェブ ページ1 - Demo
  </a>
</p>

<p>
  <a data-fancybox data-type="iframe" data-src="https://www.yahoo.co.jp/" href="javascript:;">
    ≫ ウェブ ページ2(フレーム内での表示を許可しないWeb サイトの例) - Demo
  </a>
</p>

<p>
  <a data-fancybox data-type="iframe" data-src="https://mozilla.github.io/pdf.js/web/compressed.tracemonkey-pldi-09.pdf" href="javascript:;">
     ≫ PDF ファイル - Demo (IE 表示不可)
  </a>
</p>
<p>
  <a data-fancybox data-type="iframe" data-src="http://urbanqee.com/webutil/pdfjs/web/viewer.html?file=http://urbanqee.com/webutil/photo/fancybox3/img/12_hou.pdf" href="javascript:;">
     ≫ PDF ファイル - Demo (IE 表示可 pdf.jsをインストール)
  </a>
</p>
$("[data-fancybox]").fancybox({
	iframe : {
		css : {
		//	width : '600px'
		}
	}
});
/* iframe コンテンツ */
.fancybox-slide--iframe .fancybox-content {
	width  : 860px;
	height : 600px;
	max-width  : 80%;
	max-height : 80%;
	margin: 0;
        padding:10px;
}
プロバイダー YouTube, Vimeo, Google Maps および InstgramのメディアページのURLから、埋め込みコンテンツを表示します。 URLは、Aタグのhref属性に指定します。
Instgramのデモでは、data-caption属性(キャプション)にHTMLタグを使い、ポインターリンクを設定しています(captionカスタマイズ例)。
<h2>fancyBox v3.1 - 埋め込みコンテンツ YouTube, Vimeo, Google Maps および Instgram デフォルト - Embedding(デモ)</h2>

<ul>
  <li>
    <a data-fancybox href="https://www.youtube.com/watch?v=_sI_Ps7JSEk">≫ YouTube video - Demo</a>
  </li>
  <li>
    <a data-fancybox href="https://vimeo.com/191947042">≫ Vimeo video - Demo</a>
  </li>
  <li>
    <a data-fancybox href="https://www.google.co.jp/maps/@35.68242,139.747996,13z"
       data-caption="東京・千代田区">≫ Google Maps - Demo</a>
  </li>
  <li>
    <a data-fancybox href="https://www.instagram.com/p/BLsmvjijjNf/?taken-by=jamesrelfdyer"
       data-caption="<span>ベッキー姉妹 <a href='https://www.instagram.com/becky_dayo/' target='_blank'>@becky_dayo</a></span>">
      ≫ Instagram photo - Demo</a>
  </li>
space
.fancybox-caption{
  pointer-events: visiblePainted;   /* instagramの例で、キャプションにポインターを張る場合必要 fancyboxバグ対応 SVG属性エリア? */
   }
動画の埋め込みプレーヤーの領域サイズをCSSでカスタマイズします。
<h2>fancyBox v3.1 - 動画領域サイズのカスタマイズ(CSS) - Video dimensions(デモ)</h2>

<ul>
  <li>
    <a data-fancybox href="https://www.youtube.com/watch?v=_sI_Ps7JSEk&autoplay=1&rel=0&controls=0&showinfo=0">
      YouTube video - Demo</a>
  </li>
  <li>
    <a data-fancybox href="https://vimeo.com/191947042?color=f00">
      Vimeo video - Demo</a>
  </li>
</ul>
space
.fancybox-slide--video .fancybox-content {
	width  : 533px;
	height : 300px;
	max-width  : 80%;
	max-height : 80%;
        margin: 0;
}
動画URLのパラメータ(下HTML例で青字コード)を指定することにより、動画を制御することができます。
<h2>fancyBox - YouTube, Vimeo 動画URLパラメータによる動作の制御  - Video parameters(デモ)</h2>

<ul>
  <li>
    <a data-fancybox href="https://www.youtube.com/watch?v=_sI_Ps7JSEk&autoplay=1&rel=0&controls=1&showinfo=0&start=10">
      YouTube video - hide controls and info</a>
  </li>
  <li>
    <a data-fancybox href="https://vimeo.com/191947042?color=f00&autoplay=false">
      Vimeo video - custom color</a>
  </li>
</ul>
space
space
javascriptで、fancyboxオプションの変更およびAPIを使ってfancyboxのカスタマイズを行います。
スライドショーのとき、画像遷移アニメーション効果(transitionEffect)には、指定可能な値が7つあります。それらは、false(disable), 'fade', 'slide', 'circular', 'tube', "zoom-in-out' および 'rotate' があります。
<h2>fancyBox v3.1 画像スライドアニメーション (デモ)</h2>

<h4>●ギャラリー画像(5枚)- false</h4>
<a href="sun/sun-pixabay01.jpg" data-fancybox="group1" data-caption="陽の光1 (c)pixabay.com">
       <img src="sun/sun-pixabay01s.jpg" alt="" width="150" /></a>
<a href="sun/sun-pixabay02.jpg" data-fancybox="group1" data-caption="陽の光2 (c)pixabay.com">
       <img src="sun/sun-pixabay02s.jpg" alt="" width="150" /></a>
<a href="sun/sun-pixabay03.jpg" data-fancybox="group1" data-caption="陽の光3 (c)pixabay.com">
       <img src="sun/sun-pixabay03s.jpg" alt="" width="150" /></a>
<a href="sun/sun-pixabay04.jpg" data-fancybox="group1" data-caption="陽の光4 (c)pixabay.com">
       <img src="sun/sun-pixabay04s.jpg" alt="" width="150" /></a>
<a href="sun/sun-pixabay05.jpg" data-fancybox="group1" data-caption="陽の光5 (c)pixabay.com">
       <img src="sun/sun-pixabay05s.jpg" alt="" width="150" /></a>
$("[data-fancybox]").fancybox({
         infobar: true,
         transitionEffect : false
	 //   false  - disable(無効)
	 //   'fade'
	 //   'slide'
	 //   'circular'
	 //   'tube'
	 //   'zoom-in-out'
	 //   'rotate'
});
space
defaults = {

	// Enable infinite gallery navigation
	loop : false,

	// Space around image, ignored if zoomed-in or viewport smaller than 800px
	margin : [44, 0],

	// Horizontal space between slides
	gutter : 50,

	// Enable keyboard navigation
	keyboard : true,

	// Should display navigation arrows at the screen edges
	arrows : true,

	// Should display infobar (counter and arrows at the top)
	infobar : false,

	// Should display toolbar (buttons at the top)
	toolbar : true,

	// What buttons should appear in the top right corner.
	// Buttons will be created using templates from `btnTpl` option
	// and they will be placed into toolbar (class="fancybox-toolbar"` element)
	buttons : [
		'slideShow',
		'fullScreen',
		'thumbs',
		'close'
	],

	// Detect "idle" time in seconds
	idleTime : 4,

	// Should display buttons at top right corner of the content
	// If 'auto' - they will be created for content having type 'html', 'inline' or 'ajax'
	// Use template from `btnTpl.smallBtn` for customization
	smallBtn : 'auto',

	// Disable right-click and use simple image protection for images
	protect : false,

	// Shortcut to make content "modal" - disable keyboard navigtion, hide buttons, etc
	modal : false,

	image : {

		// Wait for images to load before displaying
		// Requires predefined image dimensions
		// If 'auto' - will zoom in thumbnail if 'width' and 'height' attributes are found
		preload : "auto",

	},

	ajax : {

		// Object containing settings for ajax request
		settings : {

			// This helps to indicate that request comes from the modal
			// Feel free to change naming
			data : {
				fancybox : true
			}
		}

	},

	iframe : {

		// Iframe template
		tpl : '<iframe id="fancybox-frame{rnd}" name="fancybox-frame{rnd}" class="fancybox-iframe" frameborder="0" vspace="0" hspace="0" webkitAllowFullScreen mozallowfullscreen allowFullScreen allowtransparency="true" src=""></iframe>',

		// Preload iframe before displaying it
		// This allows to calculate iframe content width and height
		// (note: Due to "Same Origin Policy", you can't get cross domain data).
		preload : true,

		// Custom CSS styling for iframe wrapping element
		// You can use this to set custom iframe dimensions
		css : {},

		// Iframe tag attributes
		attr : {
			scrolling : 'auto'
		}

	},

	// Open/close animation type
	// Possible values:
	//   false            - disable
	//   "zoom"           - zoom images from/to thumbnail
	//   "fade"
	//   "zoom-in-out"
	//
	animationEffect : "zoom",

	// Duration in ms for open/close animation
	animationDuration : 366,

	// Should image change opacity while zooming
	// If opacity is 'auto', then opacity will be changed if image and thumbnail have different aspect ratios
	zoomOpacity : 'auto',

	// Transition effect between slides
	//
	// Possible values:
	//   false            - disable
	//   "fade'
	//   "slide'
	//   "circular'
	//   "tube'
	//   "zoom-in-out'
	//   "rotate'
	//
	transitionEffect : "fade",

	// Duration in ms for transition animation
	transitionDuration : 366,

	// Custom CSS class for slide element
	slideClass : '',

	// Custom CSS class for layout
	baseClass : '',

	// Base template for layout
	baseTpl	:
		'<div class="fancybox-container" role="dialog" tabindex="-1">' +
			'<div class="fancybox-bg"></div>' +
			'<div class="fancybox-inner">' +
				'<div class="fancybox-infobar">' +
					'<button data-fancybox-prev title="{{PREV}}" class="fancybox-button fancybox-button--left"></button>' +
					'<div class="fancybox-infobar__body">' +
						'<span data-fancybox-index></span> / <span data-fancybox-count></span>' +
					'</div>' +
					'<button data-fancybox-next title="{{NEXT}}" class="fancybox-button fancybox-button--right"></button>' +
				'</div>' +
				'<div class="fancybox-toolbar">' +
					'{{BUTTONS}}' +
				'</div>' +
				'<div class="fancybox-navigation">' +
					'<button data-fancybox-prev title="{{PREV}}" class="fancybox-arrow fancybox-arrow--left" />' +
					'<button data-fancybox-next title="{{NEXT}}" class="fancybox-arrow fancybox-arrow--right" />' +
				'</div>' +
				'<div class="fancybox-stage"></div>' +
				'<div class="fancybox-caption-wrap">' +
					'<div class="fancybox-caption"></div>' +
				'</div>' +
			'</div>' +
		'</div>',

	// Loading indicator template
	spinnerTpl : '<div class="fancybox-loading"></div>',

	// Error message template
	errorTpl : '<div class="fancybox-error"><p>{{ERROR}}<p></div>',

	btnTpl : {
		slideShow  : '<button data-fancybox-play class="fancybox-button fancybox-button--play" title="{{PLAY_START}}"></button>',
		fullScreen : '<button data-fancybox-fullscreen class="fancybox-button fancybox-button--fullscreen" title="{{FULL_SCREEN}}"></button>',
		thumbs     : '<button data-fancybox-thumbs class="fancybox-button fancybox-button--thumbs" title="{{THUMBS}}"></button>',
		close      : '<button data-fancybox-close class="fancybox-button fancybox-button--close" title="{{CLOSE}}"></button>',

		// This small close button will be appended to your html/inline/ajax content by default,
		// if "smallBtn" option is not set to false
		smallBtn   : '<button data-fancybox-close class="fancybox-close-small" title="{{CLOSE}}"></button>'
	},

	// Container is injected into this element
	parentEl : 'body',


	// Focus handling
	// ==============

	// Try to focus on the first focusable element after opening
	autoFocus : true,

	// Put focus back to active element after closing
	backFocus : true,

	// Do not let user to focus on element outside modal content
	trapFocus : true,


	// Module specific options
	// =======================

	fullScreen : {
		autoStart : false,
	},

	touch : {
		vertical : true,  // Allow to drag content vertically
		momentum : true   // Continue movement after releasing mouse/touch when panning
	},

	// Hash value when initializing manually,
	// set `false` to disable hash change
	hash : null,

	// Customize or add new media types
	// Example:
	/*
	media : {
		youtube : {
			params : {
				autoplay : 0
			}
		}
	}
	*/
	media : {},

	slideShow : {
		autoStart : false,
		speed     : 4000
	},

	thumbs : {
		autoStart   : false,   // Display thumbnails on opening
		hideOnClose : true     // Hide thumbnail grid when closing animation starts
	},

	// Callbacks
	//==========

	// See Documentation/API/Events for more information
	// Example:
	/*
		afterShow: function( instance, current ) {
			 console.info( 'Clicked element:' );
			 console.info( current.opts.$orig );
		}
	*/

	onInit       : $.noop,  // When instance has been initialized

	beforeLoad   : $.noop,  // Before the content of a slide is being loaded
	afterLoad    : $.noop,  // When the content of a slide is done loading

	beforeShow   : $.noop,  // Before open animation starts
	afterShow    : $.noop,  // When content is done loading and animating

	beforeClose  : $.noop,  // Before the instance attempts to close. Return false to cancel the close.
	afterClose   : $.noop,  // After instance has been closed

	onActivate   : $.noop,  // When instance is brought to front
	onDeactivate : $.noop,  // When other instance has been activated


	// Interaction
	// ===========

	// Use options below to customize taken action when user clicks or double clicks on the fancyBox area,
	// each option can be string or method that returns value.
	//
	// Possible values:
	//   "close"           - close instance
	//   "next"            - move to next gallery item
	//   "nextOrClose"     - move to next gallery item or close if gallery has only one item
	//   "toggleControls"  - show/hide controls
	//   "zoom"            - zoom image (if loaded)
	//   false             - do nothing

	// Clicked on the content
	clickContent : function( current, event ) {
		return current.type === 'image' ? 'zoom' : false;
	},

	// Clicked on the slide
	clickSlide : 'close',

	// Clicked on the background (backdrop) element
	clickOutside : 'close',

	// Same as previous two, but for double click
	dblclickContent : false,
	dblclickSlide   : false,
	dblclickOutside : false,


	// Custom options when mobile device is detected
	// =============================================

	mobile : {
		clickContent : function( current, event ) {
			return current.type === 'image' ? 'toggleControls' : false;
		},
		clickSlide : function( current, event ) {
			return current.type === 'image' ? 'toggleControls' : "close";
		},
		dblclickContent : function( current, event ) {
			return current.type === 'image' ? 'zoom' : false;
		},
		dblclickSlide : function( current, event ) {
			return current.type === 'image' ? 'zoom' : false;
		}
	},


	// Internationalization
	// ============

	lang : 'en',
	i18n : {
		'en' : {
			CLOSE       : 'Close',
			NEXT        : 'Next',
			PREV        : 'Previous',
			ERROR       : 'The requested content cannot be loaded. <br/> Please try again later.',
			PLAY_START  : 'Start slideshow',
			PLAY_STOP   : 'Pause slideshow',
			FULL_SCREEN : 'Full screen',
			THUMBS      : 'Thumbnails'
		},
		'de' : {
			CLOSE       : 'Schliessen',
			NEXT        : 'Weiter',
			PREV        : 'Zuruck',
			ERROR       : 'Die angeforderten Daten konnten nicht geladen werden. <br/> Bitte versuchen Sie es spater nochmal.',
			PLAY_START  : 'Diaschau starten',
			PLAY_STOP   : 'Diaschau beenden',
			FULL_SCREEN : 'Vollbild',
			THUMBS      : 'Vorschaubilder'
		}
	}

}
それぞれの効果のデモ(transitionEffect demo)を新しいページで見る: false| fade| slide| circular| tube| zoom-in-out| rotate
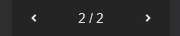
モーダル画面に表示されるツールバーなどのボタンは大きく分けると、3つあります。 それらは、モーダル画面レイアウトに示すように、option名称の infobar, toolbar および arrowsで示すボタン類です。 なお、option infobarは、デフォルトが非表示設定(false)です。
<h2>fancyBox v3.1 ツールバーなどボタン類の表示/非表示設定 - option(デモ)</h2>
<p>●個別画像</p>
<a href="people/girl-pixabay-03.jpg" data-fancybox data-caption="女性 (c)pixabay.com"><img src="people/girl-pixabay-03s.jpg" alt="" width="150" /></a>

<p>●グループ画像(ギャラリー)</p>
<a href="sun/sun-pixabay01.jpg" data-fancybox="group1" data-caption="陽の光1 (c)pixabay.com"><img src="sun/sun-pixabay01s.jpg" alt="" width="150" /></a>
<a href="sun/sun-pixabay02.jpg" data-fancybox="group1" data-caption="陽の光2 (c)pixabay.com"><img src="sun/sun-pixabay02s.jpg" alt="" width="150" /></a>
</p>
 $("[data-fancybox]").fancybox({
         //ツールバーなどすべてのボタン類の表示例
           infobar : true,
         //toolbar : true,
         //arrows : true
  });
図 fancybox3モーダル画面レイアウト (前提 媒体:ノートPC / 画面サイズ:1366x768px / ブラウザ:IE11 / 画像の実際の大きさ:1920x1214px)
画像の実際のwidth:画像の実際のheight=画像の画像のwidth(iw):画像のheight(ih) → 1920:1214=画像の画像のwidth(iw):563 より、画像の画像のwidth(iw)=1920×563÷1214=890px (5)画像の上下のmargin:拡大画像の上下のmargin。デフォルト値は44px。左右は0px。 (6)infobar:左から、矢印(<)ナビ、枚数表示、矢印(>)ナビ。
captionエリアに、画像ダウンロードリンクを設定するcaptionのカスタマイズ例です。
<h2>fancyBox v3.1 - captionエリアのカスタマイズ - 画像リンク設定 - image download link(デモ)</h2>
<h4>
●ギャラリー3枚(右クリック禁止設定になっています)
</h4>
<p>
  <a href="mume/P2270044.jpg" data-fancybox="images" data-caption="梅まつり1">
      <img src="mume/P2270044s.jpg" width=150 /></a>
  <a href="mume/P2270045.jpg" data-fancybox="images" data-caption="梅まつり2">
      <img src="mume/P2270045s.jpg" width=150  /></a>
  <a href="mume/P2270046.jpg" data-fancybox="images" data-caption="梅まつり3">
      <img src="mume/P2270046s.jpg" width=150  /></a>
</p>
$( '[data-fancybox]' ).fancybox({
  protect: true,            // 右クリック禁止
  caption : function( instance, item ) {
    var caption, link;

    if ( item.type === 'image' ) {
      caption = $(this).data('caption');
      link    = '<a href="' + item.src + '" target="_blank">この画像をダウンロード</a>';

      return (caption ? caption + '<br />' : '') + link;
    }

  }
});
.fancybox-caption{
  pointer-events: visiblePainted;   /* キャプションエリアにポインターを張る場合必要 fancyboxバグ対応 SVG属性エリア? */
   }
前項の「captionエリアのカスタマイズ - 画像リンク設定」と同じ方法で、ソーシャルボタンを設置します。
ここで設置しているソーシャルボタンは、Twitter, Facebook, LINE, Ggoogle, Hatena, Pocket, mixi, Tumblr, GREE, Ameba, Pinterest,
および Evernote の12SNSサイトです。Twitter, Facebookは、公式ボタンと非公式ボタンの両方を、他のサイトは非公式ボタンで設置しています。
非公式ボタンとは、オリジナルデザイン画像のボタンを言います。いずれにしても、公式サイトに行くことなしにソーシャルボタンを設定できます。
下javascriptコードにおいて、青字の部分は表示したいボタンについて、使用者が定義する箇所です。
<!DOCTYPE html>
<html>
<head>
<meta charset="utf-8"> <!-- HTMLソースコード utf-8 必須 -->
<meta property="og:title" content="fancyBox3のモーダルウィンドウにソーシャルボタンを設置する"> <!-- 必須 -->
<meta property="og:image" content="http://urbanqee.com/webutil/photo/fancybox/demo/img/fancybox-v3.jpg"> <!-- 推奨 -->
<meta property="og:url" content="http://urbanqee.com/webutil/photo/fancybox/demo/fancybox-socialbutton.html"> <!-- 推奨 -->
<meta property="og:type" content="article">  <!-- 推奨 article:記事 -->
<!--Twitter OGP -->
<meta name="twitter:card" content="summary_large_image">   <!-- 必須 summary(通常),summary_large_image,photo,gallery,vappなど  -->
<meta name="twitter:site" content="urbanqee">        <!-- 推奨 -->
<meta name="twitter:image" content="http://urbanqee.com/webutil/photo/fancybox/demo/img/fancybox-v3.jpg">
<meta name="twitter:title" content="fancyBox3のモーダルウィンドウにソーシャルボタンを設置する">     <!-- 推奨 -->
<meta name="twitter:url" content="http://urbanqee.com/webutil/photo/fancybox/demo/fancybox-socialbutton.html">     <!-- 推奨 -->
<meta name="twitter:description" content="fancyBox3の拡大画像に14SNSサイト、フリーデザイン画像ボタンを設置"> <!-- 推奨 -->

<title>fancyBox3のモーダルウィンドウにソーシャルボタンを設置する(デモ)</title>

</head>
<body>
<h2 class=fancy style="text-align:center"><span class="spanfancy">fancyBox3</span> のモーダルウィンドウにソーシャルボタンを設置する(デモ)</h2>

<h3 style="border-left:2px solid green"><img src="http://urbanqee.com/webutil/img/checkmark-green1.png" width=20> 写真ギャラリー Photo gallery (add social buttons)- Media type:image</h3>
<ul class=lilist>
 <li><a data-fancybox="gallery" data-caption="天狗 Tengu" class="fancybox" href="img/takao-tengu.jpg"><img src="img/takao-tengu.jpg" width=150 height=150 title="天狗" /></a>
 <li><a data-fancybox="gallery" data-caption="考える人 Le Penseur" class="fancybox" href="img/A%20Rodin.jpg"><img src="img/A%20Rodin.jpg" alt=""  width=150 height=150 /></a>
 <li><a data-fancybox="gallery" data-caption="屋根の上の牛 Le Boeuf sur le Toit " class="fancybox" href="img/P4280326.jpg"><img src="img/P4280326.jpg" alt=""  width=150 height=150 /></a>
</ul>
<h3 style="border-left:2px solid green"><img src="http://urbanqee.com/webutil/img/checkmark-green1.png" width=20> 動画ギャラリー video gallery (add social buttons)- Media type:video Embedding</h3>

<ul class=lilist>
 <li>
<figure>
  <a href="https://www.youtube.com/watch?v=CC_NZzeagEk&t=225s" data-fancybox="videos">
    <img src="img/sakura-kyoto.jpg" width=150 height=150 title="YouTube 京都 桜" />
    <figcaption>YouTube 京都 桜</figcaption>
</a>
</figure>
 <li>
<figure>
  <a href="https://vimeo.com/191947042" data-fancybox="videos">
    <img src="img/vimeo-Mai Lan-Haze.jpg" width=150 height=150 title="vimeo Mai Lan-Haze" />
    <figcaption>vimeo Mai Lan-Haze</figcaption></a>
</figure>
 <li>
<figure>
  <a href="https://www.youtube.com/watch?v=dFf4AgBNR1E" data-fancybox="videos">
    <img src="img/akb48-The Fall-in-Love Fortune.jpg" width=150 height=150 title="恋するフォーチュンクッキー The Fall-in-Love Fortune / AKB48" />
    <figcaption>YouTube AKB48</figcaption></a>
</figure>
</ul>
 $( '[data-fancybox]' ).fancybox({
        thumbs : {
            showOnStart : true
          },
	caption : function( instance, item ) {
 		var caption, link; var button;
	     if ( item.type === 'image' ) {
		caption = $(this).data('caption');
                link = '<DIV class="SNS">';
                //共有するURLについて;画像のURLを共有するときは this.href 、そのページのURLを共有するときは document.URL とする
                //* Add tweet button 公式ボタン
                link += '<div><a href="https://twitter.com/share" class="twitter-share-button" data-count="none" data-url="' + encodeURIComponent(this.href) + '" title="Twitter">Tweet</a></div>';
                //* Add FaceBook like button 公式ボタン
                //link += '<iframe src="//www.facebook.com/plugins/like.php?href=' + this.href + '&layout=button_count&show_faces=true&width=500&action=like&font&colorscheme=light&height=23" scrolling="no" frameborder="0" style="border:none; overflow:hidden; width:110px; height:23px;" allowTransparency="true"></iframe>';
                link += '<div class="fb-like" data-href="' + document.URL + '" data-layout="button_count" data-action="like" data-size="small" data-show-faces="true" data-share="false">Facebook</div>';
                // twitter shere
                link += '<img src="http://urbanqee.com/webutil/photo/lightbox290/images/Twitter.png" width=32 height=32 title="このページの情報を Facebook で共有する" style="cursor: pointer;margin-right:5px;"';
                link += ' onclick="window.open(\'http://twitter.com/share?url=' + encodeURIComponent(document.URL) + "&text=" + encodeURIComponent($('title').html()) + '\',' + '\'social_window\',\'width=600,height=600,resizable=yes,scrollbars=yes,toolbar=yes\')">';
                // Add FaceBook share button
                link += '<img src="http://urbanqee.com/webutil/photo/lightbox290/images/Facebook.png" width=32 height=32 title="このページの情報を Facebook で共有する" style="cursor: pointer;margin-right:5px;"';
                link += ' onclick="window.open(\'http://www.facebook.com/sharer.php?u=' + this.href + '&t=' + $('title').html() + '\',' + '\'social_window\',\'width=600,height=600,resizable=yes,scrollbars=yes,toolbar=yes\')">';
                // LINE it! LINEに送る  (注)client_id=1341209950&state=1409338029 要事前確認
                link += '<img src="http://urbanqee.com/webutil/photo/lightbox290/images/line-share-d.png" width=32 height=32 title="このページの情報を LINE に送る" style="cursor: pointer;margin-right:5px;"';
                link += ' onclick="window.open(\'https://access.line.me/dialog/oauth/weblogin?response_type=code&client_id=1341209950&state=1409338029&redirect_uri=https%3A%2F%2Ftimeline.line.me%2Fauth%3FreturnUrl%3Dhttps%253A%252F%252Ftimeline.line.me%252Fsocial-plugin%252Fshare%253Furl%253D' + encodeURIComponent(encodeURIComponent(this.href)) + '&t=' + encodeURIComponent(encodeURIComponent($('title').html())) + '\',' + '\'social_window\',\'width=600,height=600,resizable=yes,scrollbars=yes,toolbar=yes\')">';
                // google+1
                link += '<img src="http://urbanqee.com/webutil/photo/lightbox290/images/google_plus.png" width=32 height=32 title="このページの情報を Google+ で共有する" style="cursor: pointer;margin-right:5px;"';
                link += ' onclick="window.open(\'https://plus.google.com/share?url=' + encodeURIComponent(this.href) + '\',' + '\'social_window\',\'width=600,height=600,resizable=yes,scrollbars=yes,toolbar=yes\')">';
                // hatena はてなブックマーク
                link += '<img src="http://urbanqee.com/webutil/photo/lightbox290/images/hatena-bookmark.png" width=32 height=32 title="このページの情報を はてなブックマーク に追加する" style="cursor: pointer;margin-right:5px;"';
                link += ' onclick="window.open(\'http://b.hatena.ne.jp/add?mode=confirm&url=' + encodeURIComponent(this.href) + "&title=" + encodeURIComponent($('title').html()) + '\',' + '\'social_window\',\'width=600,height=600,resizable=yes,scrollbars=yes,toolbar=yes\')">';
                // pocket ポケット
                link += '<img src="http://urbanqee.com/webutil/photo/lightbox290/images/getpocket.png" width=32 height=32 title="このページの情報を pocket で共有する" style="cursor: pointer;margin-right:5px;"';
                link += ' onclick="window.open(\'http://getpocket.com/edit?url=' + encodeURIComponent(this.href) + "&title=" + encodeURIComponent($('title').html()) + '\',' + '\'social_window\',\'width=600,height=600,resizable=yes,scrollbars=yes,toolbar=yes\')">';
                // mixiチェック - (7) (注2)k=mixiチェックキー (キーは事前登録)
                link += '<img src="http://urbanqee.com/webutil/photo/lightbox290/images/mixi-check.gif" width=32 height=32 title="このページの情報を mixi check で共有する" style="cursor: pointer;margin-right:5px;"';
                link += ' onclick="window.open(\'https://mixi.jp/share.pl?mode=login&u=' + encodeURIComponent(this.href) + "&k=" + "mixi1234567890" + '\',' + '\'social_window\',\'width=600,height=600,resizable=yes,scrollbars=yes,toolbar=yes\')">';
                // tumblr-post
                link += '<img src="http://urbanqee.com/webutil/photo/lightbox290/images/tumblr-logo-whiteonblue-512.png" width=32 height=32 title="このページの情報を Tumblr で共有する" style="cursor: pointer;margin-right:5px;"';
                link += ' onclick="window.open(\'https://www.tumblr.com/login?redirect_to=https%3A%2F%2Fwww.tumblr.com%2Fwidgets%2Fshare%2Ftool%3Fposttype%3Dlink%26title%3D' + encodeURIComponent(encodeURIComponent($('title').html())) + "%26content%3D" + encodeURIComponent(encodeURIComponent(this.href)) + "%26canonicalUrl%3D" + encodeURIComponent(encodeURIComponent(this.href)) + "%26shareSource%3Dtumblr_share_button%26_format%3Dhtml" + '\',' + '\'social_window\',\'width=600,height=600,resizable=yes,scrollbars=yes,toolbar=yes\')">';
                // GREE-share
                link += '<img src="http://urbanqee.com/webutil/photo/lightbox290/images/gree-btn_logo_32.png" width=32 height=32 title="このページの情報を GREE で共有する" style="cursor: pointer;margin-right:5px;"';
                link += ' onclick="window.open(\'https://pid.gree.net/login/entry?ignore_sso=1&backto=http%3A%2F%2Fgree.jp%2F%3Fmode%3Dshare%26act%3Dwrite%26url%3D' + encodeURIComponent(this.href) + "%26button_type%3D3%26button_size%3D20&campaign_code=" + '\',' + '\'social_window\',\'width=600,height=600,resizable=yes,scrollbars=yes,toolbar=yes\')">';
                //Amebaブログ post
                link += '<img src="http://urbanqee.com/webutil/photo/lightbox290/images/ameba-icon_app.png" width=32 height=32 title="このページの情報を Amebaブログ で共有する" style="cursor: pointer;margin-right:5px;"';
                link += ' onclick="window.open(\'http://blog.ameba.jp/ucs/entry/srventryinsertinput.do?entry_text=' + encodeURIComponent($('title').html()) + "<br>" + encodeURIComponent(document.URL) + "&editor_flg=1" + '\',' + '\'social_window\',\'width=600,height=600,resizable=yes,scrollbars=yes,toolbar=yes\')">';
                //pinterest
                link += '<img src="http://urbanqee.com/webutil/photo/lightbox290/images/pinterest3.png" width=32 height=32 title="このページの情報を Pinterest で共有する" style="cursor: pointer"';
                link += ' onclick="window.open(\'https://jp.pinterest.com/join/?next=/pin/create/button/%3Furl%3D' + encodeURIComponent(encodeURIComponent(this.href)) + "%26description%3D" + encodeURIComponent(encodeURIComponent($('title').html())) + "%26media%3D" + encodeURIComponent(encodeURIComponent('http://urbanqee.com/webutil/photo/fancybox/demo/people/girl-pixabay-03.jpg')) + '\',' + '\'social_window\',\'width=600,height=600,resizable=yes,scrollbars=yes,toolbar=yes\')">';
                //Evernote clip(15)
                link += '<img src="http://urbanqee.com/webutil/photo/lightbox290/images/evernote.png" width=32 height=32 title="このページの情報を Evernote で共有する" style="cursor: pointer;margin-right:5px;"';
                link += ' onclick="window.open(\'https://www.evernote.com/clip.action?url=' + encodeURIComponent(this.href) + '&title=' + encodeURIComponent($('title').html()) + '\',' + '\'social_window\',\'width=700,height=600,resizable=yes,scrollbars=yes,toolbar=yes\')">';
                link += '</DIV>';
			return (caption ? caption + '<br />' : '') + link;
        	}
               else{
                link = '<DIV class="SNS">';
                //共有するURLについて;画像のURLを共有するときは this.href 、そのページのURLを共有するときは document.URL とする
                //* Add tweet button 公式ボタン
                link += '<div><a href="https://twitter.com/share" class="twitter-share-button" data-count="none" data-url="' + encodeURIComponent(this.href) + '" title="Twitter">Tweet</a></div>';
                //* Add FaceBook like button 公式ボタン
                //link += '<iframe src="//www.facebook.com/plugins/like.php?href=' + this.href + '&layout=button_count&show_faces=true&width=500&action=like&font&colorscheme=light&height=23" scrolling="no" frameborder="0" style="border:none; overflow:hidden; width:110px; height:23px;" allowTransparency="true"></iframe>';
                link += '<div class="fb-like" data-href="' + document.URL + '" data-layout="button_count" data-action="like" data-size="small" data-show-faces="true" data-share="false"></div>';
                // twitter shere
                link += '<img src="http://urbanqee.com/webutil/photo/lightbox290/images/Twitter.png" width=32 height=32 title="このページの情報を Facebook で共有する" style="cursor: pointer;margin-right:5px;"';
                link += ' onclick="window.open(\'http://twitter.com/share?url=' + encodeURIComponent(document.URL) + "&text=" + encodeURIComponent($('title').html()) + '\',' + '\'social_window\',\'width=600,height=600,resizable=yes,scrollbars=yes,toolbar=yes\')">';
                // Add FaceBook share button
                link += '<img src="http://urbanqee.com/webutil/photo/lightbox290/images/Facebook.png" width=32 height=32 title="このページの情報を Facebook で共有する" style="cursor: pointer;margin-right:5px;"';
                link += ' onclick="window.open(\'http://www.facebook.com/sharer.php?u=' + this.href + '&t=' + $('title').html() + '\',' + '\'social_window\',\'width=600,height=600,resizable=yes,scrollbars=yes,toolbar=yes\')">';
                // LINE it! LINEに送る  (注)client_id=1341209950&state=1409338029 要事前確認
                link += '<img src="http://urbanqee.com/webutil/photo/lightbox290/images/line-share-d.png" width=32 height=32 title="このページの情報を LINE に送る" style="cursor: pointer;margin-right:5px;"';
                link += ' onclick="window.open(\'https://access.line.me/dialog/oauth/weblogin?response_type=code&client_id=1341209950&state=1409338029&redirect_uri=https%3A%2F%2Ftimeline.line.me%2Fauth%3FreturnUrl%3Dhttps%253A%252F%252Ftimeline.line.me%252Fsocial-plugin%252Fshare%253Furl%253D' + encodeURIComponent(encodeURIComponent(this.href)) + '&t=' + encodeURIComponent(encodeURIComponent($('title').html())) + '\',' + '\'social_window\',\'width=600,height=600,resizable=yes,scrollbars=yes,toolbar=yes\')">';
                link += '</DIV>';
                return ($(this).find('figcaption').html()) + link;
               }

	},

afterShow: function( instance, slide ) { //v3.2.0

  //twttr.widgets.load(); // 公式ボタン用
  if (typeof twttr === 'undefined') {
    var twitterjs = document.createElement("script");
    twitterjs.async = true;
    twitterjs.src = '//platform.twitter.com/widgets.js';
    document.getElementsByTagName('body')[0].appendChild(twitterjs);
  }
  else {
    twttr.widgets.load();
  }

  // Facebook  // 公式ボタン用
  if(typeof FB === 'undefined'){
    $('body').append('<div id="fb-root"></div>');
    var fbjs = document.createElement('script');
    fbjs.id = 'facebook-jssdk';
    fbjs.src = '//connect.facebook.net/ja_JP/all.js#xfbml=1&appId={Facebook App ID}';
    document.getElementsByTagName('body')[0].appendChild(fbjs);
  }else{
    FB.XFBML.parse();
  }

        }
});
  .SNS div{
    float: left; margin: 2px; display: block;
    vertical-align: middle; cursor: pointer
   }
  .SNS:after { content: ""; clear: both; display: block; }

/*  LIタグで横並び    */
 UL.lilist li {
	    float: left;
	    list-style-type: none; margin:2px
   }
 UL.lilist { zoom:1;  overflow: hidden;} /* 横並びの ClearHack */
個々のコンテンツのタイトル(キャプション)を設定するAタグのdata-captionには、HTMLタグが書けるので、テキストのタイトルの他に、画像や外部サイトへのポインターリンクなど の設置ができます。
<h2>fancyBox v3.1 - Aタグdata-caption属性によるcaptionのカスタマイズ - 画像、ポインターリンク設定(デモ)</h2>

<ul>
  <li>
    <a data-fancybox="insta" href="https://www.instagram.com/p/BLsmvjijjNf/?taken-by=jamesrelfdyer"
      data-caption="<span><img src='img/instagram-w32.png'> ベッキー姉妹 <a href='https://www.instagram.com/becky_dayo/' target='_blank'>@becky_dayo</a></span>">
      Instagram photo - Becky</a>
  </li>
  <li>
    <a data-fancybox="insta" href="https://www.instagram.com/p/BU0d7qZFcwz/?taken-by=rolaofficial" data-caption="<span><img src='img/instagram-w32.png'> ローラ <a href='https://www.instagram.com/rolaofficial/' target='_blank'>@rolaofficial</a></span>">
      Instagram photo - Rola</a>
  </li>
</ul>
space
.fancybox-caption{
  pointer-events: visiblePainted;   /* キャプションエリアにポインターを張る場合必要 fancyboxバグ対応 SVG属性エリア? */
   }
サムネール画像は、画面右のtoolbarエリアに通常は表示されますが、これは画面の下に配置したい場合のカスタマイズ例です。
<h2>fancyBox v3.1 サムネール画像を画面の下に配置 - Thumbnails at the bottom(デモ)</h2>
<h4>●グループ画像(ギャラリー)</h4>
<a href="sun/sun-pixabay01.jpg" data-fancybox="group1" data-caption="陽の光1 (c)pixabay.com"><img src="sun/sun-pixabay01s.jpg" alt="" width="150" /></a>
<a href="sun/sun-pixabay02.jpg" data-fancybox="group1" data-caption="陽の光2 (c)pixabay.com"><img src="sun/sun-pixabay02s.jpg" alt="" width="150" /></a>
<a href="sun/sun-pixabay03.jpg" data-fancybox="group1" data-caption="陽の光3 (c)pixabay.com"><img src="sun/sun-pixabay03s.jpg" alt="" width="150" /></a>
<a href="sun/sun-pixabay04.jpg" data-fancybox="group1" data-caption="陽の光4 (c)pixabay.com"><img src="sun/sun-pixabay04s.jpg" alt="" width="150" /></a>
<a href="sun/sun-pixabay05.jpg" data-fancybox="group1" data-caption="陽の光5 (c)pixabay.com"><img src="sun/sun-pixabay05s.jpg" alt="" width="150" /></a>
</p>
$('[data-fancybox="images"]').fancybox({
  thumbs : {
    autoStart : true
  }
})
@media all and (min-width: 800px) {

  .fancybox-thumbs {
    top: auto;
    width: auto;
    bottom: 0;
    left: 0;
    right : 0;
    height: 95px;
    padding: 10px;
    box-sizing: border-box;
    background: rgba(0, 0, 0, 0.3);
  }

  .fancybox-show-thumbs .fancybox-inner {
    right: 0;
    bottom: 95px;
  }

}
画像などの枚数表示(何枚/何枚中)をcaptionエリアエリア内に表示します。
<h2>fancyBox3のcaptionエリアのカスタマイズ - 画像枚数表示 - image count(デモ)</h2>
<h4>●ギャラリー3枚(何枚/何枚中 表示)</h4>
<p>
  <a href="mume/P2270044.jpg" data-fancybox="images" data-caption="梅まつり1">
      <img src="mume/P2270044s.jpg" width=150 /></a>
  <a href="mume/P2270045.jpg" data-fancybox="images" data-caption="梅まつり2">
      <img src="mume/P2270045s.jpg" width=150  /></a>
  <a href="mume/P2270046.jpg" data-fancybox="images" data-caption="梅まつり3">
      <img src="mume/P2270046s.jpg" width=150  /></a>
</p>
$( '[data-fancybox]' ).fancybox({

  caption : function( instance, item ) {
    var captions = $(this).data('caption') || '';

    return '(<span data-fancybox-index></span>/<span data-fancybox-count></span>) ' + ( captions.length ? ' ' + captions : '' );
  }
});
space
captionエリアの表示は、画面からマウスが離れるとその表示が消えます。また、マウスオーバするとcaptionエリアが表示されます。 captionエリアを常に表示するときは、オプションidleTimeを使います。 また、captionエリアは、そのエリアのtopに白い1pxのボーダーラインが付いています。このボーダーラインを消したいときは、CSSを使いクラス名fancybox-captionで制御します。
<h2>fancyBox3のcaptionエリアのカスタマイズ - 画像枚数表示 - image count(デモ)</h2>
<h4>●ギャラリー3枚(captionエリア 常に表示)</h4>
<p>
  <a href="mume/P2270044.jpg" data-fancybox="images" data-caption="梅まつり1">
      <img src="mume/P2270044s.jpg" width=150 /></a>
  <a href="mume/P2270045.jpg" data-fancybox="images" data-caption="梅まつり2">
      <img src="mume/P2270045s.jpg" width=150  /></a>
  <a href="mume/P2270046.jpg" data-fancybox="images" data-caption="梅まつり3">
      <img src="mume/P2270046s.jpg" width=150  /></a>
</p>
$( '[data-fancybox]' ).fancybox({
  idleTime: false,  // captionエリア false:常に表示 true:画面マウスアウトで非表示/マウスオーバーで表示

  caption : function( instance, item ) {
    var captions = $(this).data('caption') || '';
    return '(<span data-fancybox-index></span>/<span data-fancybox-count></span>) ' + ( captions.length ? ' ' + captions : '' );
  }
});
.fancybox-caption{
    border: none;
   }
fancybox関連リンク
Lightbox系メディアビューア(まとめ サイト内リンク)
| No | ビューアー | JSフレームワーク | モーダル window*2 | 画像 | 動画*1 | 動画共有サイト 動画 | Webページ | スライドシュー | 備考 |
| 1 | Lightbox | PrototypeからjQueryに変更(v2.51) | モーダル | ● | ● | 人気 | |||
| 2 | Pirobox | jQuery | モーダル | ● | ● | 推奨 | |||
| 3 | Videobox | mootools | モーダル | ● | |||||
| 4 | Mediabox | mootools | モーダル | ● | ● | ● | |||
| 5 | Shadowbox | Prototype、
MooTools (requires 1.2 Core)、
Dojo Toolkit、 Yahoo! User Interface Library、 Ext (requires ext-core.js)、 非JSフレームを選択可 | モーダル | ● | ● | ● | ● | ● | 推奨 |
| 6 | Colorbox | jQuery | モーダル | ● | ● | ● | ● | ● | |
| 7 | Fotorama | jQuery | 非モーダル | ● | ● | ● | ● | ● | スライダー |
| 8 | Fancybox | jQuery | モーダル | ● | ● | ● | ● | ● | 人気 |
| ※動画とは、SWF、FLV、MOV、WMV(*1) ※モーダルwindow:画像などメディアの表示は新しい別ウインドー(*2) | |||||||||
 最終更新日:2017.6.18(初版)- 2017.6.25